Overview
This playbook will walk you through setting up Scarf to get a clearer picture of how people are interacting with your open-source project. You’ll learn how to create and use Scarf Pixels, track open source project documentation views, measure engagement across social media, and more. With these steps, you can bring all your data together in one place, see who’s engaging with your project, and fine-tune your outreach—all from your Scarf Dashboard.
What you’ll need
- Scarf (sign up for free). You can sign up with a valid email address or your GitHub account.
- An organization already set up. If you need help setting one up, check out the first step in this playbook.
Step 0: Measure web traffic to your project's documentation pages, READMEs, and other web properties
Click plus icon in the top navigation, then select New Pixel.

Give your pixel a name, select an Owner to manage its scope. We recommend selecting as Owner the Organization created in step 0.
Pro Tip: You can optionally attach it to a package you manage on Scarf. This allows you to see different engagements under the same signal—like connecting your project's download package to a pixel on your documentation page. By doing this, you can track both interactions in the same Dashboard and see which companies are downloading your project or viewing your documentation.
Head to your Scarf Dashboard and, in the Tools dropdown, select Pixels. Click Copy Pixel Snippet to grab the code, then paste it into your project's README, documentation, or any other web pages where you want to track who's visiting (whether on your site or on third-party sites).
After correctly implementing the Scarf Pixel, you can access your tracked website and view the pixel data in your Scarf Dashboard.
To know more about how the Scarf Pixel works, visit our documentation.
Step 1: Track any file downloads
Using Package URL, you can track any file downloads, whether it be .zip, or .tar.gz, text files like JSON, or even raw executables.
You can also track each release specifically, including details like which versions are being downloaded, for which platforms, and other relevant information.
An example download URL for one of these releases might look like:
https://github.com/aviaviavi/curl-runnings/releases/download/0.16.0/curl-runnings-0.16.0-mac.tar.gz
Factoring in the different artifacts being distributed for each release, and the associated version numbers for each release, we have a URL template of the form:
https://github.com/aviaviavi/curl-runnings/releases/download/{version}/curl-runnings-{version}-{platform}.tar.gz
- In the Scarf Homepage, click the + icon in the navigation, then select New Package.
- In the first drop-down click on the package type you would like to create. For this section, you will click File.

- Select the package owner from the dropdown.
- Give your package a name.
Pro tip: We recommend giving your package a distinctive name, especially if you have multiple files you want to keep track of.
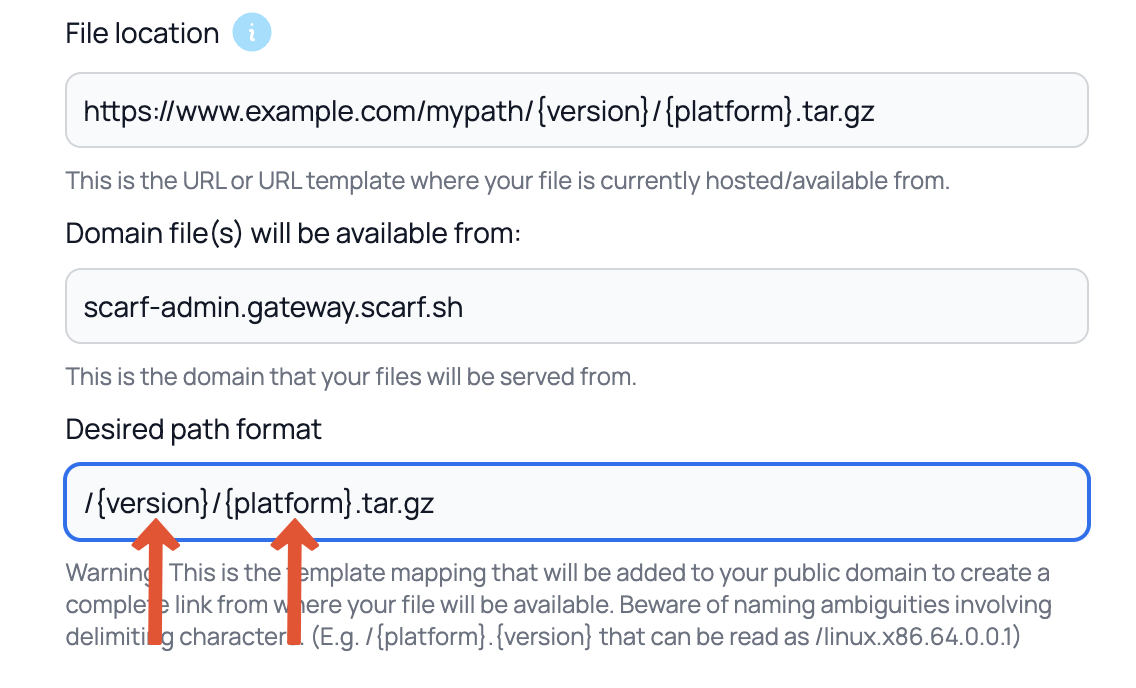
- Add the URL path where your files are currently located. You can add a simple URL or a URL template like
https://www.example.com/mypath/{version}/{platform}.tar.gz
This example uses 2 variables {version} and {platform}.
In this example, {version} and {platform} are placeholders. Replace the curly-braced words with the actual version number and platform name.
The Outgoing URL is the full URL to your asset on your HTTP/S hosting provider. It can be a URL template, but if you use variables in your URL, they need also to be used in your Incoming Path that are defined in the next step.
- Choose the domain where your files should be available. You may choose to use your own domain for serving files. You may also choose to use <username>.gateway.scarf.sh provided by default by Scarf.
- Add the Incoming URL Path, which will be the new path your files will be available from.

- Click Submit.
Step 2. Track any link to measure engagement in social media and other platforms
This acts as a link shortener to your website, YouTube, Hacker News, or other sites.
- Repeat the same first steps. Create a new File Package, select an owner, and give it a name.
- In File Location, add the link that you want to track. This can be useful if, for instance, you're running an outreach campaign and want to monitor clicks on a specific link from an email. In this step, we will use the link to this blog post: https://about.scarf.sh/post/below-the-surface-why-open-source-needs-analytics. This is the link we will include in the File Location section.
- Choose the domain where your files should be available from. You may choose to use your own domain for serving files. You may also choose to use <username>.gateway.scarf.sh, provided by default by Scarf.
- The Desired Path is the new path your web page will be available from. You can use this section to track additional parameters or UTM codes to figure out where the link click is coming from.
Tracking additional parameters and data for your links enables you to more effectively analyze which channels are working and which channels are not. It also allows you to gain insight into how your users behave and where you can reach them.
Here are some interesting ways to use this functionality:
- Tracking project downloads from different channels:
- Pass in the source of a download. For example: blog, LinkedIn, documentation, etc.
- Tracking links coming from social media to your external content:
- Pass in the source of the link: Facebook, LinkedIn, Twitter, etc.
- Tie back clicks and interactions to ad campaigns or spend:
- This enables you to optimize spends. For example: campaign fall_2023, winter_2023
- Tie back Scarf data to external systems, like CRMs or logins:
- username=john.doe or jane doe
- Track partner links/downloads
Step 3: Add more routes to your Scarf Package
You can also add as many additional routes as you want. This is useful if you want to track different versions or platforms in a package, such as the downloads of the latest version available.
To do this, in the top menu click on Tools, then in the drop-down menu click on Packages.
In the package list dashboard, you will find a list of all your packages. These can be filtered by type of packages. In our example, as we just created a file package, we’ll select File.
Navigate to our newly created file package and in the top right of its box click the View Details button.

Click Add Route.
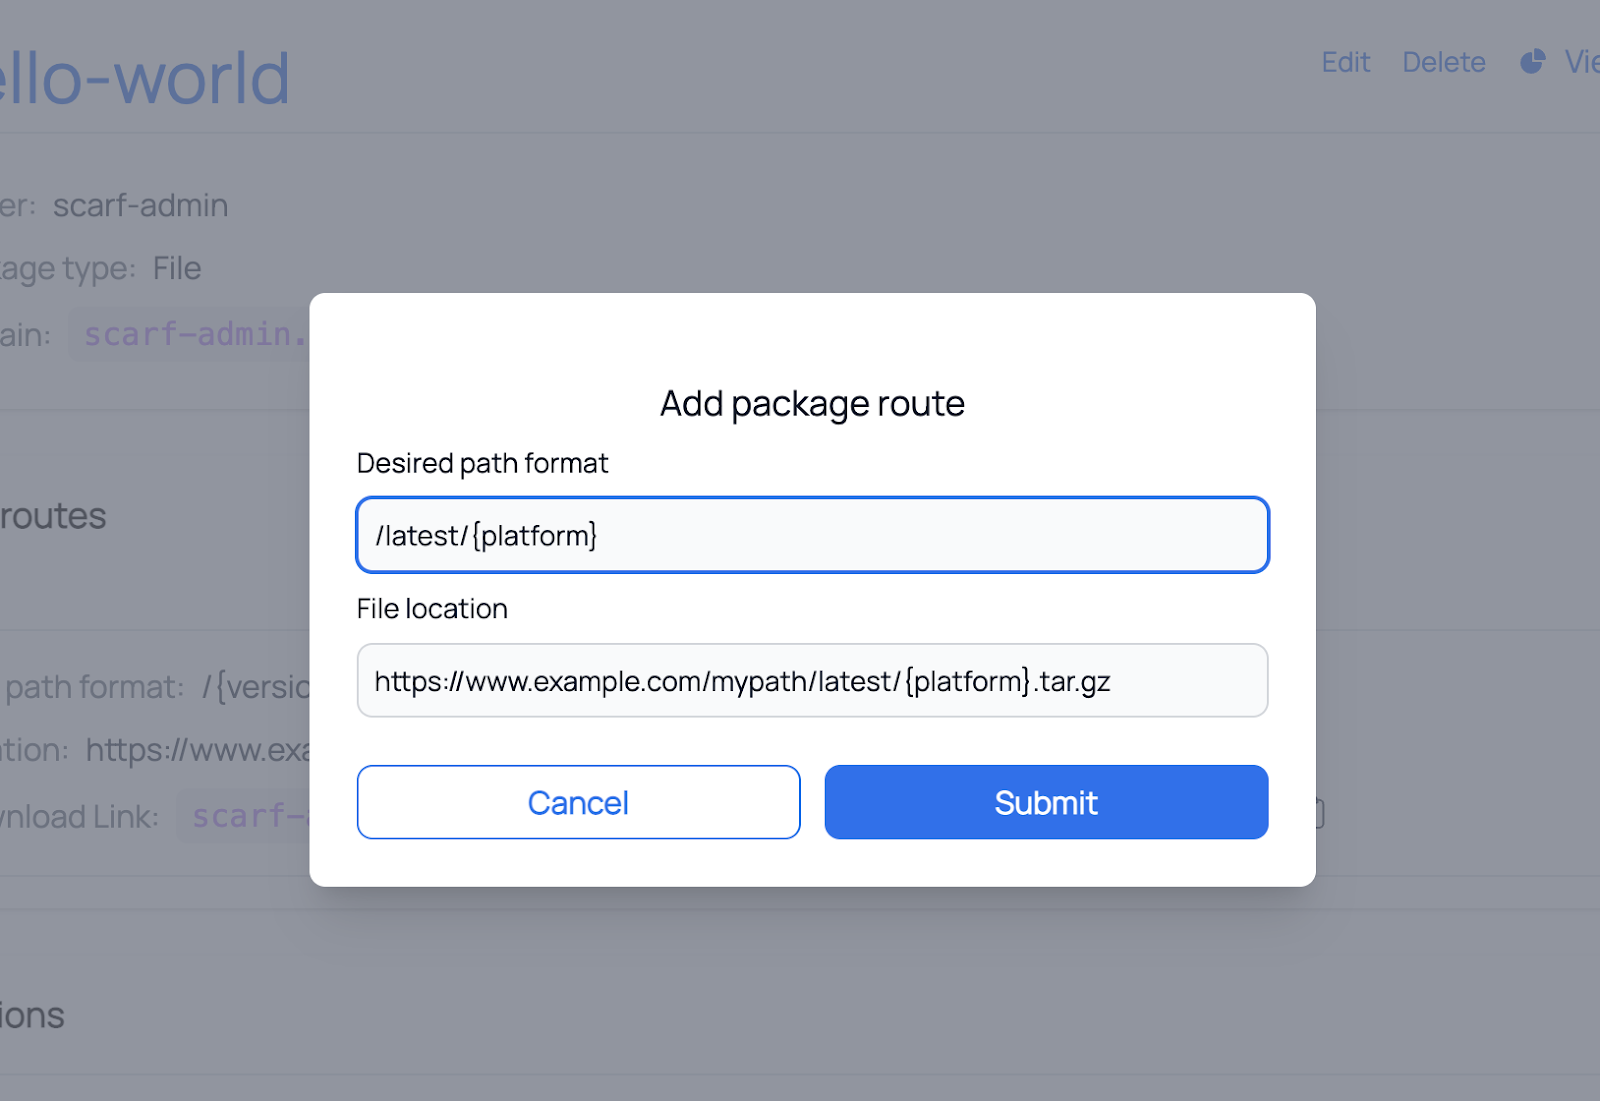
In the popup modal, use the File Location input to add a new host URL. You can use a template URL here.
Example:
https://www.example.com/mypath/latest/{platform}.tar.gz
Next, add the desired path format for your files. Make sure the variables from your Outgoing and Incoming URLs match if you use a template URL.
Example:
/latest/{platform}

Click the Submit button.
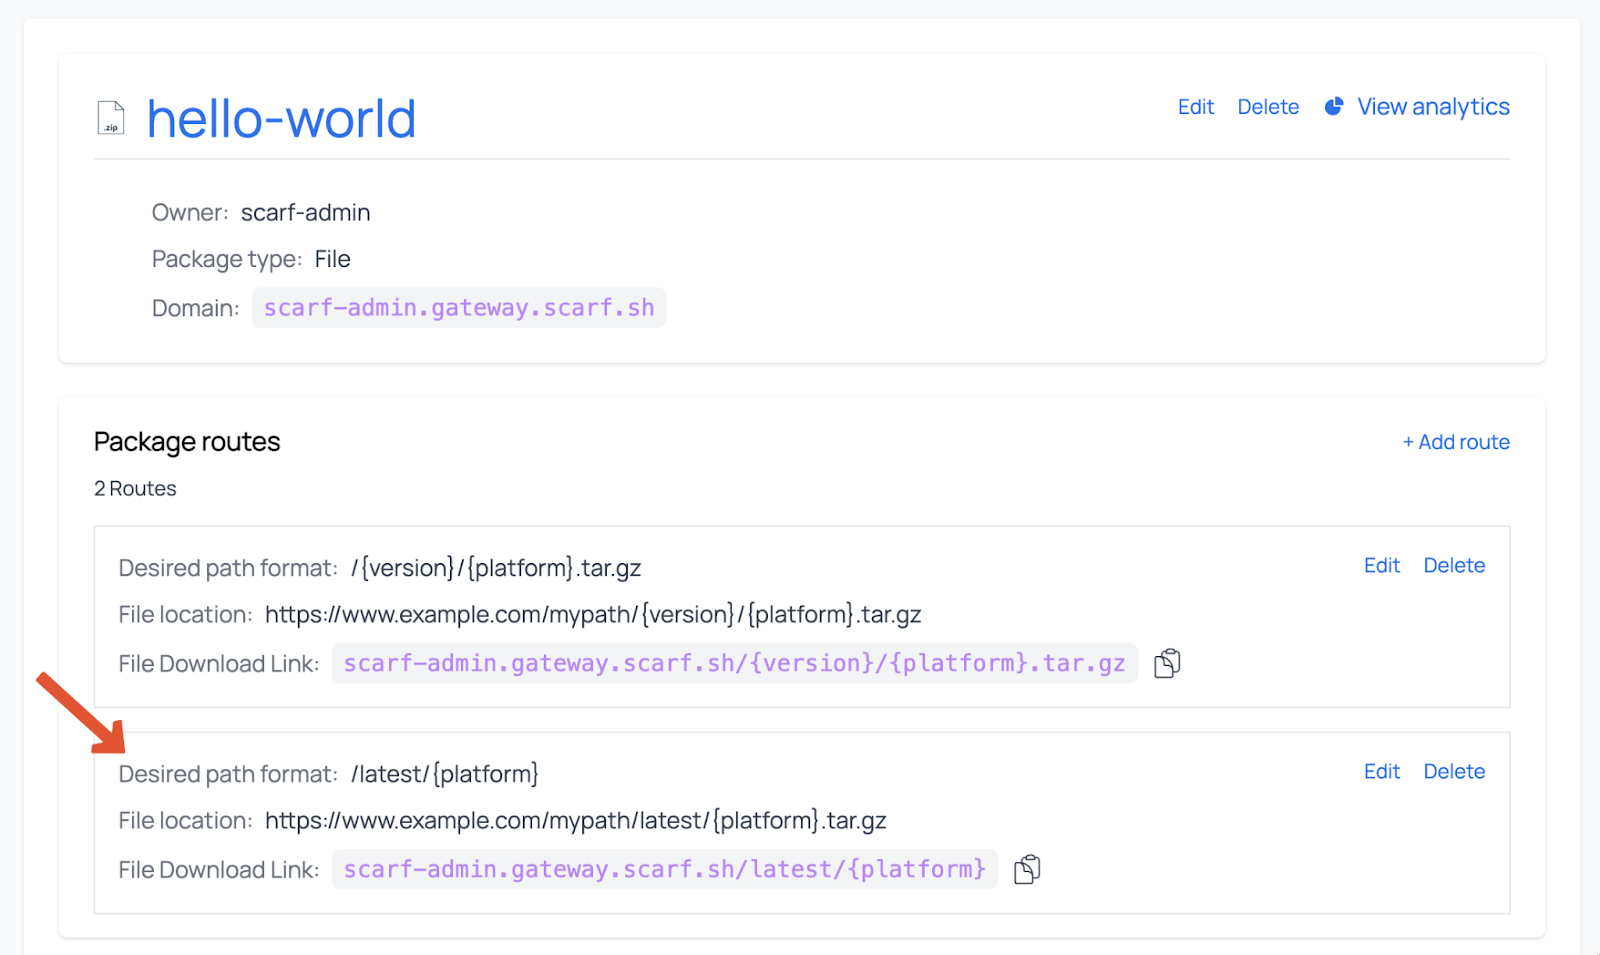
The modal will close, and you will see the additional route you just added.

If you want to improve your lead flow, start by filling out the lead generation form once your data is flowing in. Reach out to your customer success manager or our sales team to inquire about a trial of Scarf's lead generation service.

