Overview
Tracking downloads of your open-source projects is key to understanding user engagement. With Scarf, you can see which versions are popular, which platforms are being targeted, and who’s using your software. This playbook will show you how to set up Scarf to monitor your project’s downloads.
What you’ll need:
- Scarf (sign up for free). You can sign up with a valid email address or your GitHub account.
- If you’re looking to track a container, it must be published to an existing public registry (e.g., Docker Hub or GitHub Container Registry).
Step 0: Create an Organization
To create an organization, in the header menu, click on Organization.

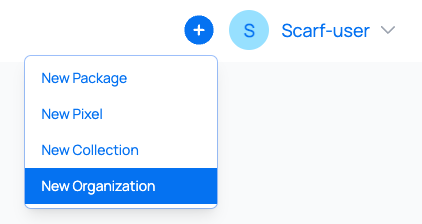
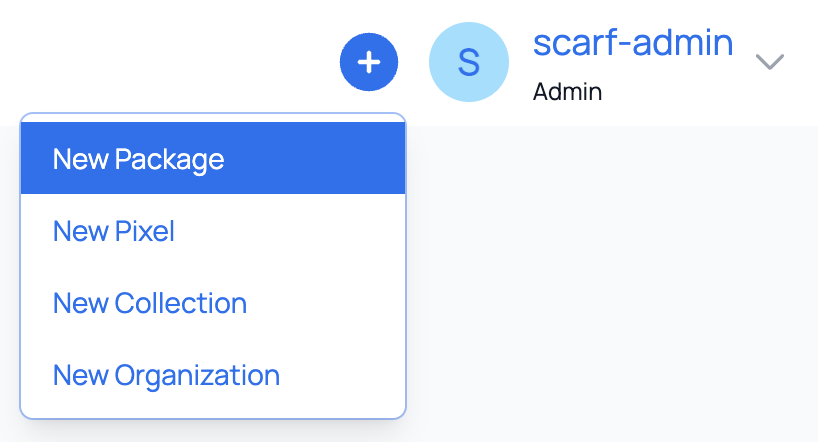
Alternatively, you can access it via the + icon and selecting New Organization.
If you haven't already set up an organization, you will be presented with the following screen:

As you can see, you are presented with two options:
- Create Organization: Select this option if you want to create a freestanding organization.
- Convert Account to Organization: If it happens that you've added lots of new packages and found that you'd like to put these under an organization umbrella, this is the perfect way to achieve that. By doing this, you will be able to share data from Scarf Packages and Pixels you’ve created with others within your organization.
For this playbook, we will cover how to create a new organization. You can learn more about converting your account to an organization in our documentation.
After clicking on Create Organization, you will be prompted to add your organization details. Click Save.
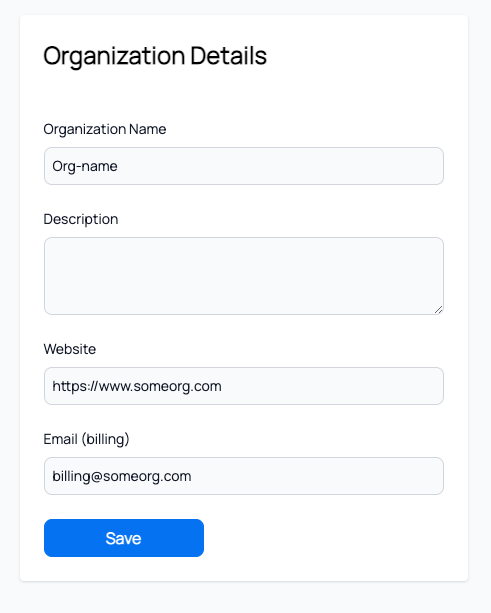
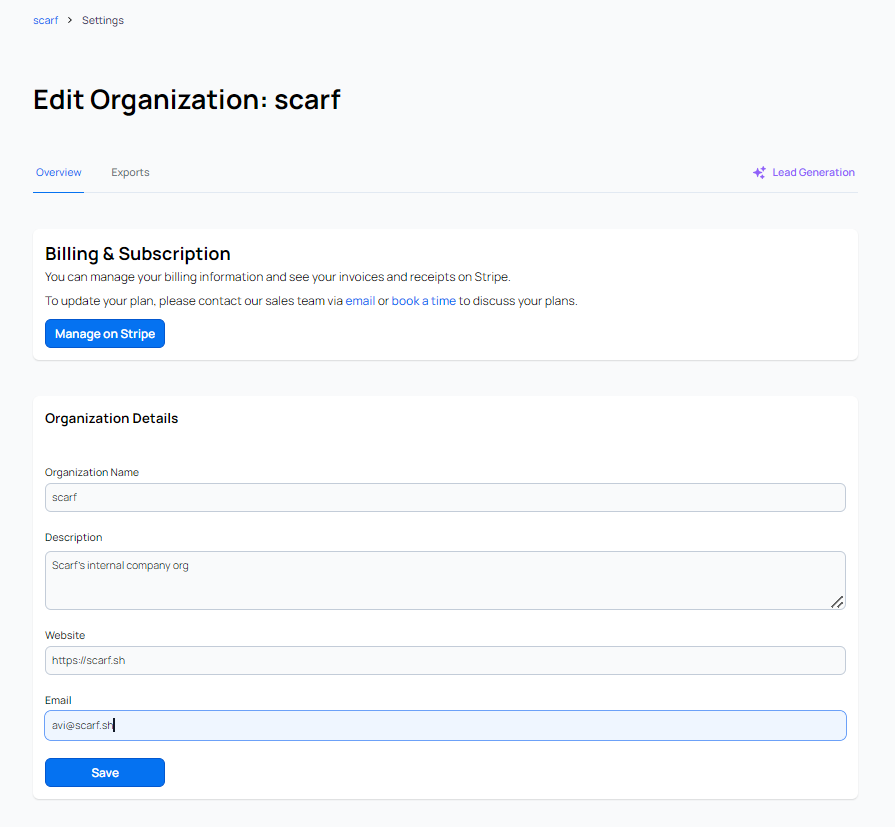
You now have an organization you can edit by clicking Organizations, and then selecting the pencil icon.
Pro Tip: Opt for an organization name familiar to you and potential members. Your company or project name is often the most recognizable choice. If you choose to utilize Scarf-provided domains in the future, this organization name will be utilized as part of the public-facing domain (e.g., mydomain.gateway.scarf.sh), so choose wisely!

To access your new organization from the Scarf App Home Page, click the dropdown menu in the upper right corner and select your organization.
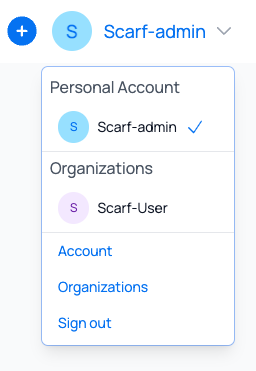
You will now be able to create Scarf Packages and Pixels within your organization and access it whenever you want.
Pro Tip: When looking at the menu in the upper right corner, you will now see two circles. The larger being what organization you are accessing and the smaller one being the user you are doing it with.

Step 1: Set up a new package URL
Navigate to the home page and click the + icon in the top navigation, then select New Package.
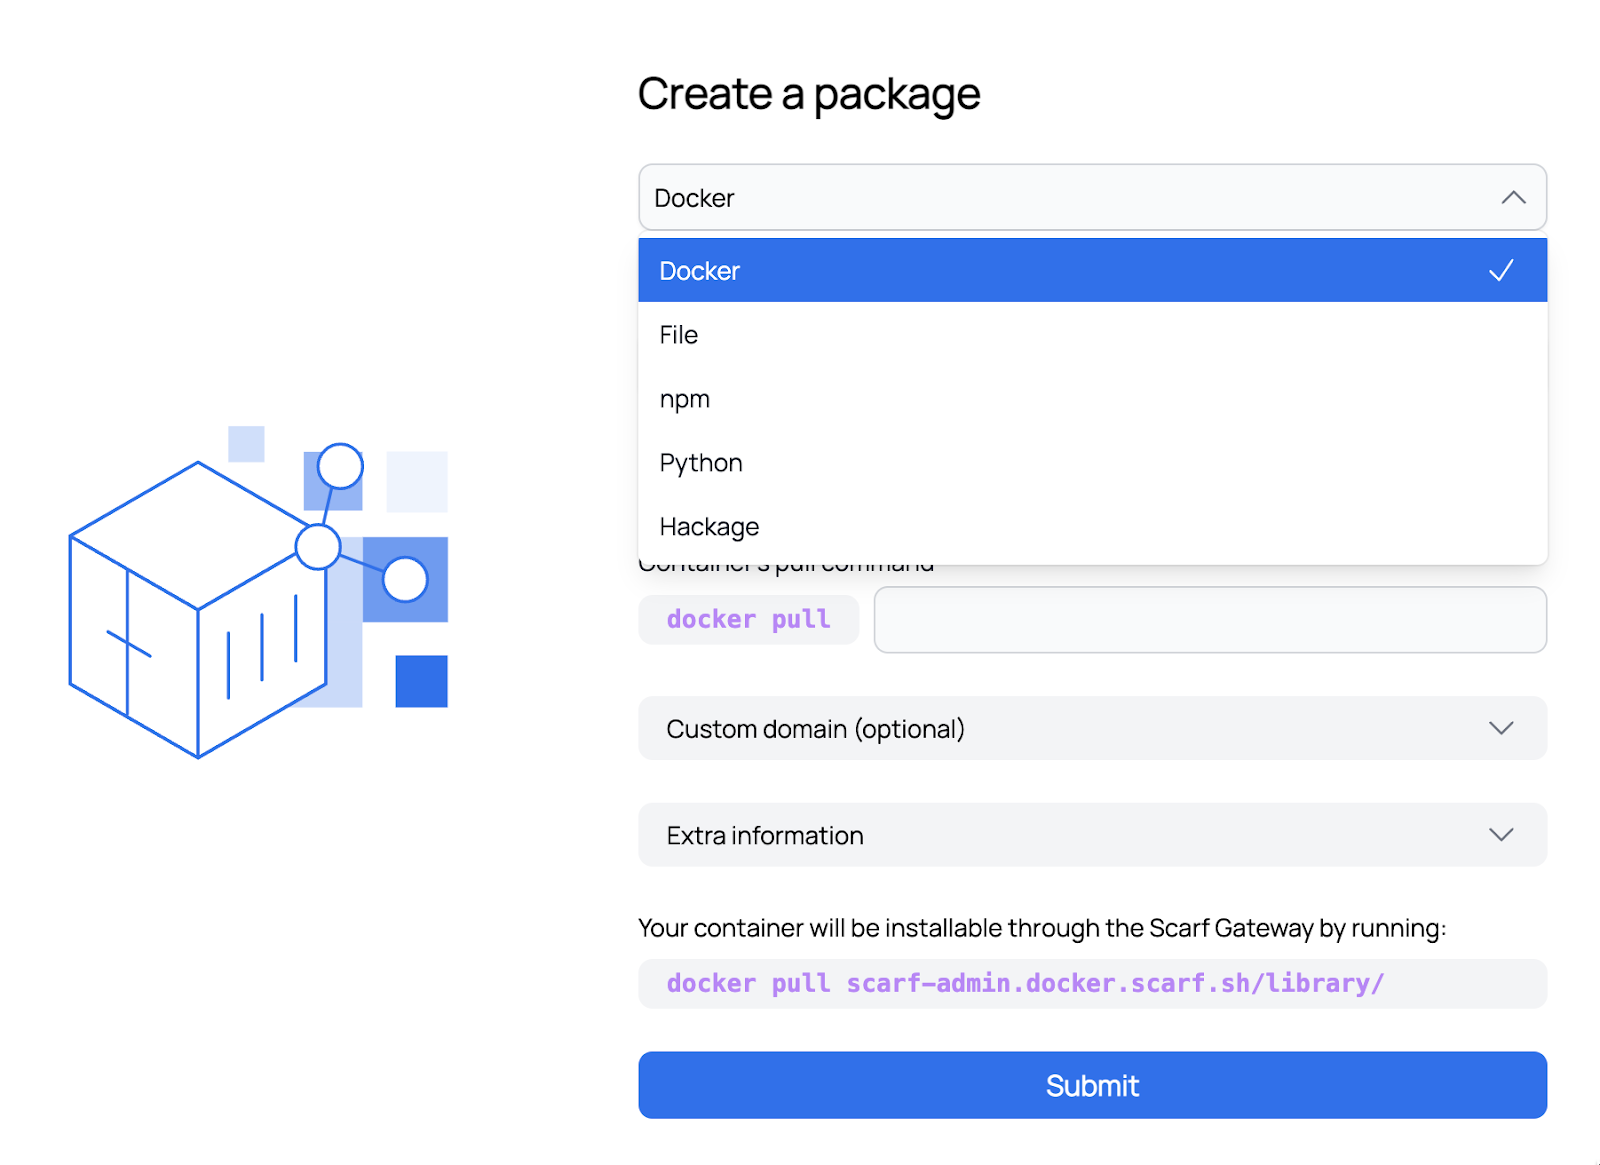
In the first drop-down click on the package type you would like to track. For this playbook, we will create a Package URL for a Docker Package.
Enter the current pull command for your Docker container. For example:
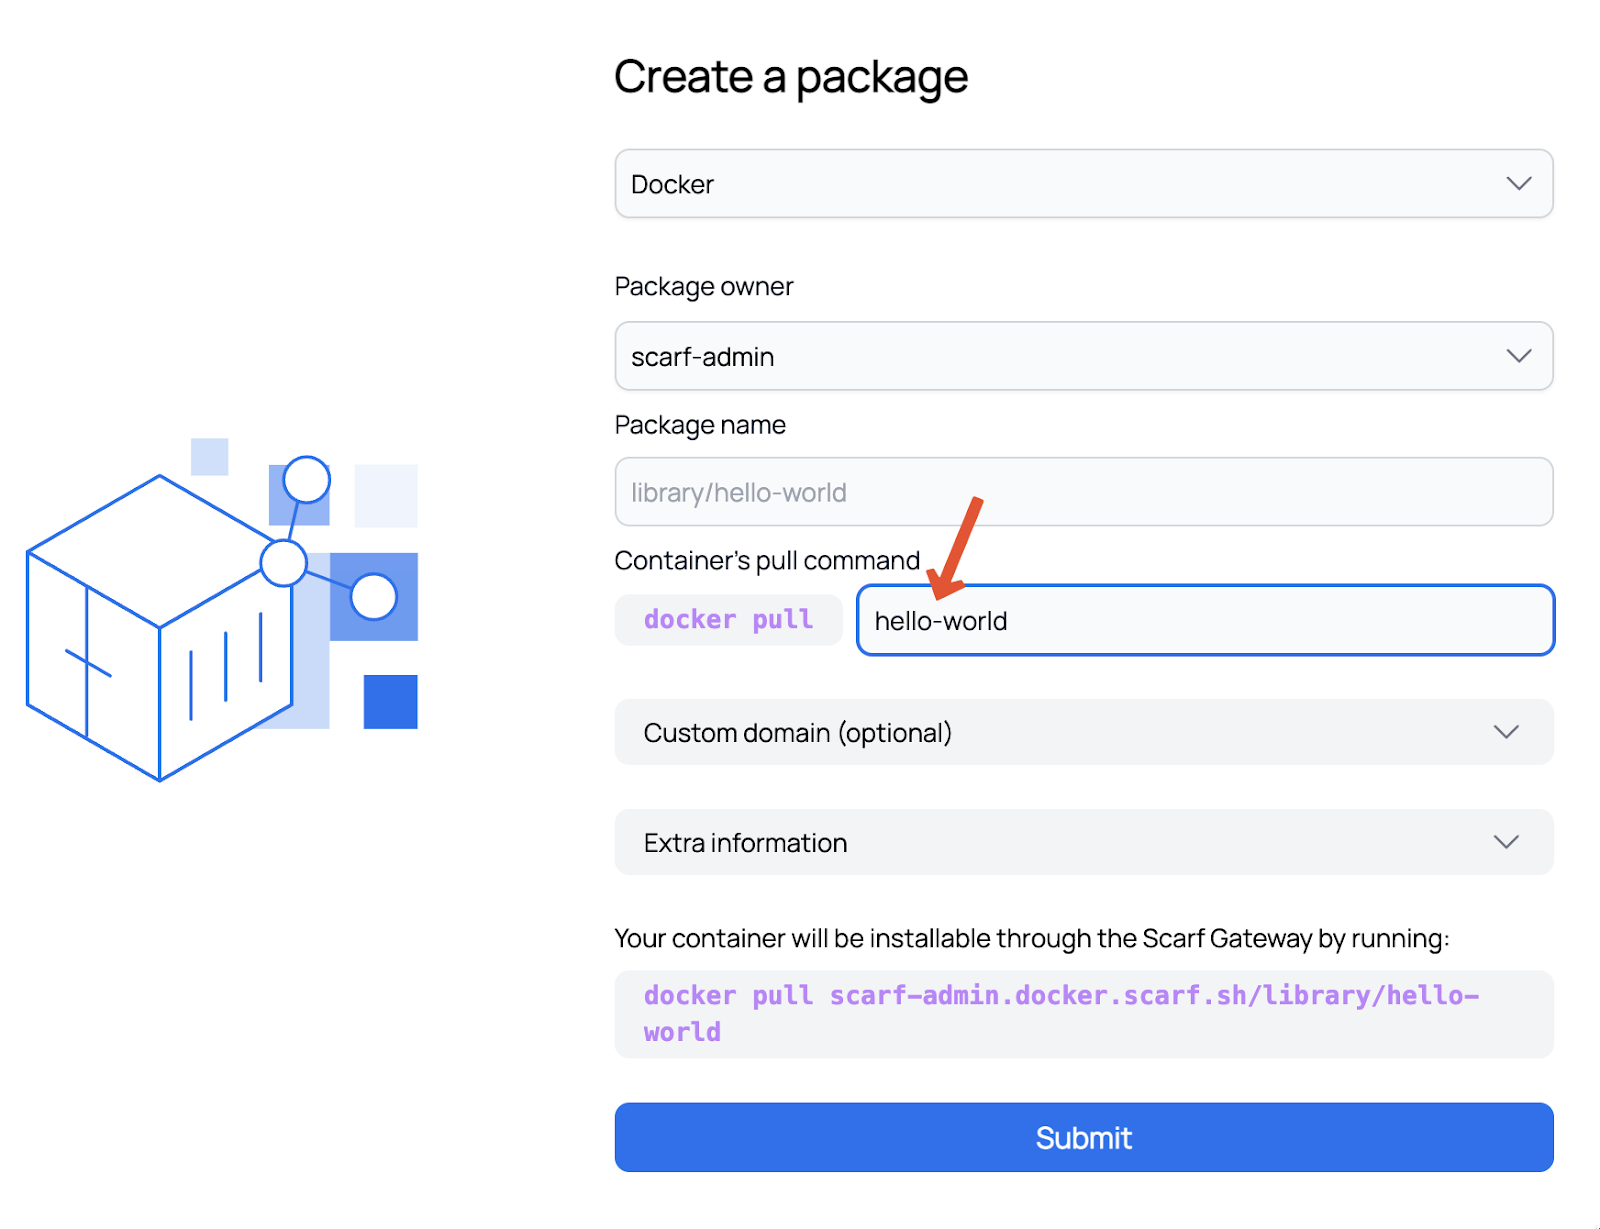
Pro-tip: You can add a custom domain into the “Custom domain (optional)” section, or you can use the default domain provided by Scarf. If you elect to utilize your own custom domain, be sure to follow the DNS instructions provided by Scarf after you submit the package.
Click the Submit button to be redirected to a success screen with some additional information as to what you can do next.
Now you’re all set to start tracking your project’s downloads with Scarf. Any time your image is downloaded, Scarf will report the following information:
- System and OS statistics of your users
- Company information of your users
- Downloads by versions/tags.
Step 2: Test your Package URL
To download your package, go to the Tools dropdown, and click on Packages. Select the package you just created. You will find your download link in the Pull Command section.
Step 3: Update installation and setup documentation to direct users to use the new Pull Command.
After creating your Scarf package URL, it's important to update your project's installation and setup documentation to guide users to use the new Pull Command.
Identify where your installation instructions are located in your project. This could be in a README file, a dedicated setup guide, or online documentation.
Replace the existing pull command(s) with the new Scarf package URL. For example, if your original pull command was:
docker pull hello-world
Update it to:
docker pull yourorganization.gateway.scarf.sh/hello-world
Provide a brief explanation in your documentation about the change. Inform users that this new URL helps you improve the project by providing insights into usage without compromising their privacy.
If your project has an active user base, announce the change through your usual communication channels—such as mailing lists, social media, or your project’s website. Explain why the update was made and how it benefits the project and its users.
Step 4: Test the route either via your web browser, curl, or with wget.
Ensure the new command works as expected. Follow the instructions yourself or have someone else test them to confirm there are no issues. Check the Scarf Dashboard to see your download registered.
You’ve now set up Scarf to track your project’s downloads and updated your documentation with the new pull command. This setup provides valuable insights into who is using your project and how it's being used. Regularly check your Scarf Dashboard for the latest data to make informed decisions and improve your project.
If you want to improve your lead flow, start by filling out the lead generation form once your data is flowing in. Reach out to your customer success manager or our sales team to inquire about a trial of Scarf's lead generation service.

